
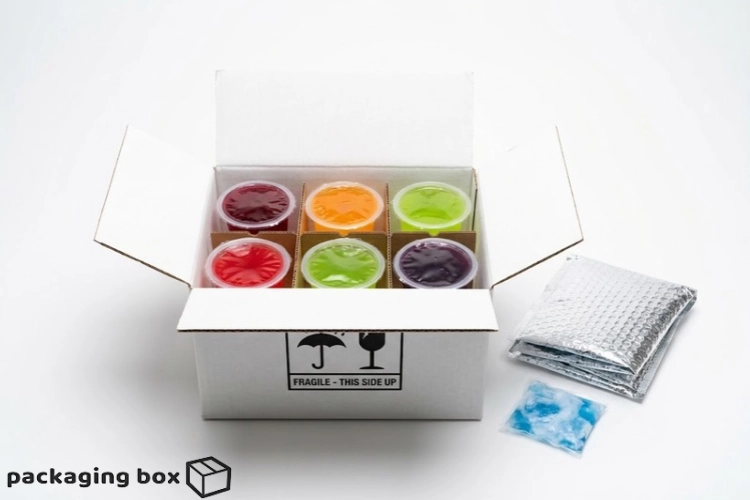

You spend hours perfecting the flavor, the color, and the wobble. Then a rider takes a sharp turn, and your customer opens a box full of sticky, tilted, half-empty cups. Good jelly cup delivery packaging is what separates a five-star review from a refund request. The jelly itself is rarely the problem. The packaging around it usually is.
This guide walks you through why jelly cups fail in transit, which materials actually protect them, and a simple seven-step packing method you can start using today. Every tip comes from real delivery conditions in Pakistan: hot summers, crowded roads, and long last-mile routes.
🚚 Why Jelly Cups Spill and Break During Delivery
Before fixing a problem, you need to know where it starts. Jelly cups are small, light, and often filled close to the rim. That makes them more fragile than they look.
Movement and Tilting
Most spillage during transit comes from movement. A cup that slides, tips, or rolls inside a box will leak even if the lid is decent. Bike riders, rough roads, and sudden braking all create sideways force. If your cups have room to move, they will move.
Pressure From Above and Below
Stacked boxes, heavy bags placed on top, and overpacked cartons crush thin cup walls. A crushed cup pops its lid or splits at the seam. The damage often stays invisible until your customer opens the box.
Heat and Softening
Jelly is a gel, and gels soften when warm. In summer, a delivery that sits in the sun for twenty minutes can turn firm jelly into a loose, watery mess. Melted or softened jelly spreads faster and finds every gap in a weak seal.
Weak Seals and Poor Lids
A lid that “mostly fits” is not enough. Loose lids, thin film, and uneven sealing lead to broken seals and leakage. Customers also read a broken seal as a hygiene warning, which hurts trust even when the jelly is perfectly fine.
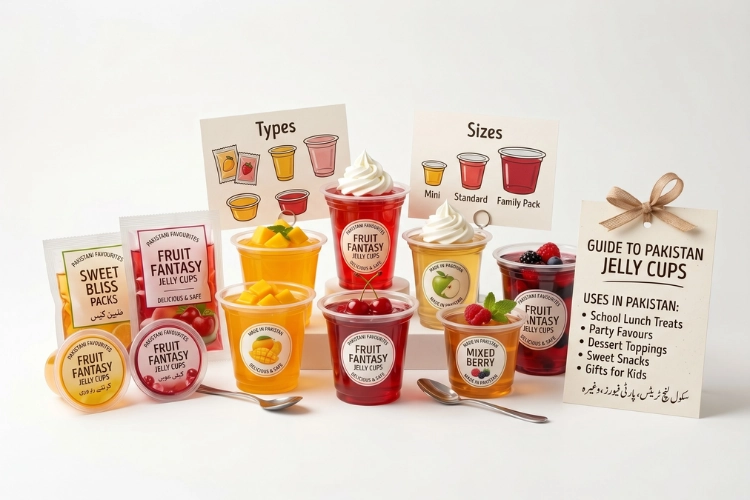
If you want a refresher on cup types and sizes before choosing packaging, our guide on what a jelly cup is, with types, sizes and uses in Pakistan covers the basics.
📦 The Four Layers of Jelly Cup Delivery Packaging
Think of protection as layers, like a winter coat. Each layer handles a different risk, and skipping one leaves a gap. Let’s look at them one by one.
Layer 1: The Cup and Lid
The first layer is the container itself. Choose food-grade cups with a snug lid or a sealed film. A cup that is too wide for its lid will always leak under pressure. Matching cup size to your product matters too. If you are deciding between small shots and larger servings, this comparison of the 25ml vs 90ml jelly cup will help you pick the right size for your market.
You can browse ready-to-use options in our jelly cup collection, including the 25ml jelly cup and the 90ml jelly cup. Check each product page for exact specifications before you order in bulk.
Layer 2: The Inner Support
This layer keeps cups upright and separated. Cup holders, cardboard dividers, or cavity inserts stop cups from touching, sliding, or tipping. A tight grid is better than loose padding, because it holds each cup in its own pocket.
Layer 3: The Outer Box
The outer box takes the hits. Corrugated cartons absorb pressure far better than plain folding boxes. For a closer look at why, read our comparison of a corrugated box vs a regular box for online shipping. If your cartons are bending, our guide on how to strengthen a corrugated box shows simple fixes.
Layer 4: Temperature Protection
The last layer fights heat. Insulated delivery bags and gel ice packs keep the inside cool, which protects texture and shelf life. This layer matters most from April to September in most Pakistani cities.
Quick Comparison of Protection Layers
| Layer | Main Job | Typical Material | Risk It Solves |
|---|---|---|---|
| Cup and lid | Contain the jelly | Food-grade cup, lid or heat seal film | Leaks, contamination |
| Inner support | Hold cups upright | Cup insert, divider, foam | Tipping, sliding |
| Outer box | Resist pressure | Corrugated carton | Crushed cups |
| Temperature layer | Keep jelly firm | Insulated bag, gel ice pack | Melting, softening |
Each layer works best when the others are in place. A great lid inside a weak box still fails, and a strong box with loose cups still spills.
✅ How to Pack Jelly Cups for Delivery: 7 Steps That Work
Here is the practical part. Follow these seven steps in order, and your spill rate should drop noticeably. Think of it as a routine you repeat for every order.
Step 1: Fill Correctly and Leave Headspace
Never fill the cup to the brim. A small gap between the jelly surface and the lid absorbs movement and prevents the jelly from touching the seal. Overfilled cups push jelly into the lid edge, which causes leaks the moment the cup tilts.
If you sell retail cups, our tutorial on how to fill and seal jelly cups for retail sale walks through filling levels and sealing in detail.
Step 2: Let the Jelly Set Fully and Chill First
Pack only fully set, properly chilled jelly. Warm or half-set jelly sloshes inside the cup and puts pressure on the lid. Many sellers rush this step during busy days, and it is one of the most common reasons for complaints. Chill the cups for the full setting time, then chill them again in the fridge right before packing.
Step 3: Secure the Lid or Seal Properly
This is the heart of leak-proof jelly cups. Press the lid on firmly all the way around, and check that no edge is lifted. If you use heat seal film, make sure the seal is even and has no wrinkles. For extra security, a tamper-proof seal or a thin strip of food-safe tape over the lid adds protection and gives customers confidence that nobody opened the cup.
For dessert cups that ship with lids, take a look at our dessert cups with lid option. It suits sellers who want a simple, secure closure.
Step 4: Use Cup Inserts or Dividers
Place cups inside a holder or divider so each one sits in its own slot. This is the single biggest improvement most small sellers can make. Without dividers, cups bump into each other, and thin walls crack under repeated knocks.
If you don’t have custom inserts yet, a folded corrugated grid or a snug cardboard sleeve works as a budget solution. For larger trays, clear lid boxes can hold cups neatly while still showing off the dessert.
Step 5: Fill the Empty Space
Empty space equals movement. After placing cups in the box, check for gaps along the sides and top. Fill them with crumpled kraft paper, foam strips, or bubble wrap. The goal is a tight pack where nothing shifts when you shake the box gently.
A good rule: if you hear or feel anything move, add more filler. Tight packing also reduces vibration, which protects the seals.
Step 6: Choose a Sturdy Outer Box and Seal It Well
Pick a box that fits the cups snugly, not one that is far too large. A box that is too big allows internal movement, and one that is too small squeezes the cups. Corrugated boxes are the safest option for delivery because they resist crushing.
Seal all seams with strong packaging tape, and add a second strip across the bottom. For shipping beyond your city, a heavier option like a 7-ply DHL shipping box or a standard e-commerce box gives extra strength. If you are new to shipping, our e-commerce packaging guide for first-time buyers explains how to choose the right setup.
Step 7: Label the Box Clearly
Add “Fragile,” “This Side Up,” and “Keep Cool” labels on the top and at least two sides. Labels do two jobs. They remind riders and couriers to handle the box with care, and they help the customer know how to store the jelly. Upright packaging only works if the box stays upright, so clear arrows matter.
🌡️ Temperature Control and Shelf Life
Heat is the silent enemy of delivery desserts. Even perfectly sealed cups can soften and sweat if the temperature rises. That affects shelf life, taste, and appearance.
Insulated Bags and Gel Packs
For local delivery, an insulated bag with one or two gel ice packs is usually enough. Place the packs beside the cups, not directly under them, so cold contact does not freeze or damage the jelly. For longer routes, use more packs and consider a chilled box with a foil liner.
Timing Matters
Pack as close to dispatch time as possible. Cups left sitting on a counter warm up quickly, so keep them in the fridge until the rider arrives. During summer, tell customers to refrigerate the jelly as soon as it arrives. A short note inside the box takes five seconds to write and prevents many complaints.
Food Safety and Hygiene
Clean hands, clean surfaces, and food-grade materials are non-negotiable. Packaging must also meet basic food safety standards. Use only food-grade cups, lids, and films, and avoid reusing materials that touched other products. A sealed cup with visible proof of hygiene builds trust, which is worth more than any discount.
For wider guidance on safe material choices, see our overview of food packaging in Pakistan.
🧪 A Simple Test Before You Ship
You don’t need a lab to test your packaging. A basic routine can reveal weak spots in minutes, and it shows customers you care about quality. Try this with one sample box:
- Pack it exactly as you would a real order.
- Tilt the box to about 45 degrees and hold it for ten seconds.
- Shake it gently side to side, then lift it a few centimeters and set it down.
- Open it and check for leaks, shifted cups, and lifted lids.
If anything moved, add filler or tighten the inserts. Repeat until the cups stay put. Many sellers also ask a friend or family member to carry a test box on a bike for a short ride. Real conditions expose problems fast.
🛠️ Common Problems and Quick Fixes
Even careful sellers run into trouble. This table matches typical complaints with simple solutions, so you can fix issues without guesswork.
| Problem | Likely Cause | Quick Fix |
|---|---|---|
| Jelly leaks from the lid | Overfilled cup or loose lid | Leave headspace and press the lid firmly |
| Cups tipped sideways | No dividers or inserts | Add cup holders or a cardboard grid |
| Cups cracked or crushed | Weak outer box | Switch to a corrugated carton and fill gaps |
| Jelly soft or watery | Heat during transit | Use insulated bags and gel ice packs |
| Seal looks broken | Poor sealing or rough handling | Use tamper-proof seals and label the box fragile |
Most of these problems have more than one cause, so fix the biggest one first and test again. Small changes often deliver large improvements.
💰 Cost, Sustainability and Brand Presentation
Good packaging is an investment, but it doesn’t have to drain your budget. The goal is cost-effective packaging that protects the product and presents your brand well.
Count the Cost of Failure
A single refund usually costs more than the extra packaging that would have prevented it. You lose the product, the delivery fee, and the customer’s goodwill. Seen this way, a divider or a better box pays for itself within a few orders.
Buying in Bulk
When your order volume grows, bulk packaging for businesses lowers the cost per unit. Our guide on bulk packaging orders, minimum quantities and costs helps you plan purchases, and our article on where to buy wholesale packaging in Pakistan points you to reliable options.
Going Eco-Friendly
More customers now notice waste. Eco-friendly packaging, such as recyclable cartons and biodegradable fillers like kraft paper, shows you care without hurting protection. Our overview of eco-friendly custom packaging boxes offers practical ideas to start with.
Make Unboxing Memorable
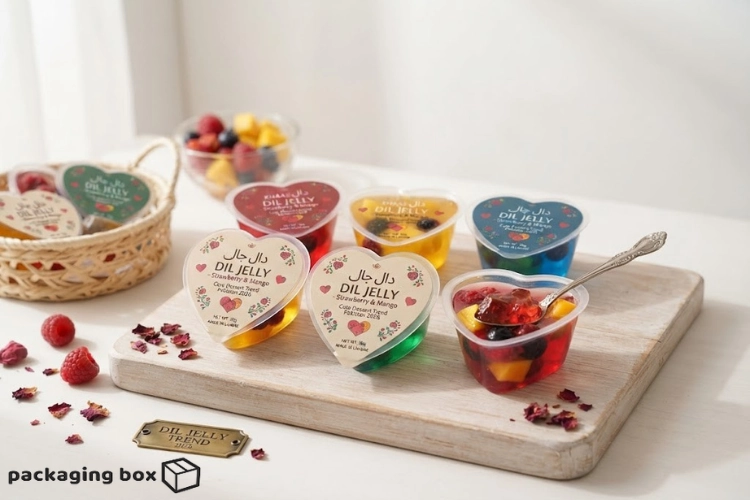
Packaging is also your first handshake with the customer. A clean box, a neat label, and a small thank-you card improve brand presentation and customer satisfaction at almost no cost. If you sell themed desserts, designs like the heart jelly cup, the choc dip jelly cup, or a jelly cup cone make your delivery stand out and photograph well on social media.
For seasonal rushes, our dessert packaging guide for 14 August home bakers shows how to prepare larger orders without losing quality.
🍰 A Practical Example: Packing 6 Jelly Cups for a Home Order
Let’s put everything together with a real scenario. Imagine a home seller in Lahore delivering six cups across town on a warm afternoon.
She chills the cups overnight and fills them with a small gap below the rim. She presses each lid firmly and adds a thin tamper-proof strip. The six cups go into a cardboard grid insert, each in its own slot. She sets the grid in a snug corrugated box and fills the gaps with crumpled kraft paper. A gel pack sits beside the grid, wrapped in paper so it won’t sweat onto the cups. She seals the box with tape, adds “Fragile” and “This Side Up” labels, and places it inside an insulated bag.
The whole process takes about three minutes. The result is a box that survives bumps, stays cool, and arrives looking as good as it did in her kitchen. If you run a larger operation, our article on starting a jelly cup business in Pakistan shows how to scale this routine.
A related lesson comes from cake sellers, who face the same sliding problem. Our guide on why a cake slides inside the box during delivery shares ideas that apply to jelly cups too.
❓ Frequently Asked Questions
How do you pack jelly cups so they don’t spill?
Leave a little headspace in each cup, secure the lid or seal firmly, and place the cups upright in dividers inside a snug corrugated box. Fill all gaps so nothing moves, then label the box “Fragile” and “This Side Up.”
What is the best packaging for jelly cups?
The best setup combines food-grade cups with tight lids or heat seal film, cup inserts, a corrugated outer box, and an insulated bag with gel packs for warm weather. Each layer protects against a different risk.
How do you keep jelly cups from melting during delivery?
Chill the jelly fully before packing, keep cups in the fridge until dispatch, and use insulated bags with gel ice packs. Tell customers to refrigerate the cups as soon as they arrive.
Can jelly cups be shipped safely?
Yes, for local and city-to-city delivery, if they are sealed, upright, cushioned, and kept cool. Longer routes need stronger boxes and more cooling, so test one sample box before shipping a full order.
Why do jelly cups leak during shipping?
The usual causes are overfilled cups, loose lids, damaged seals, and movement inside the box. Fixing headspace, sealing, and inner support solves most leaks.
Which lids are best for leak-proof jelly cups?
Snug-fitting lids and evenly applied heat seal film work best. Add a tamper-proof strip for extra security and customer trust.
🎯 Conclusion: Protect the Jelly, Protect the Brand
Great jelly cup delivery packaging comes down to four ideas: seal well, hold cups upright, cushion the box, and keep everything cool. None of these steps is expensive or complicated. Together they cut spillage, reduce refunds, and turn first-time buyers into repeat customers.
Start by testing your current setup with the simple tilt-and-shake routine, then fix the weakest layer first. Small improvements add up quickly, and customers notice the difference the moment they open the box.
🛒 Ready to Upgrade Your Packaging?
Explore our full jelly cup range, pair it with sturdy corrugated e-commerce boxes, and order the right materials in the quantities you need. Reach out to the PackagingBox.pk team today for bulk pricing and packaging advice tailored to your dessert business.



💬 0 Comments
Leave a Comment