
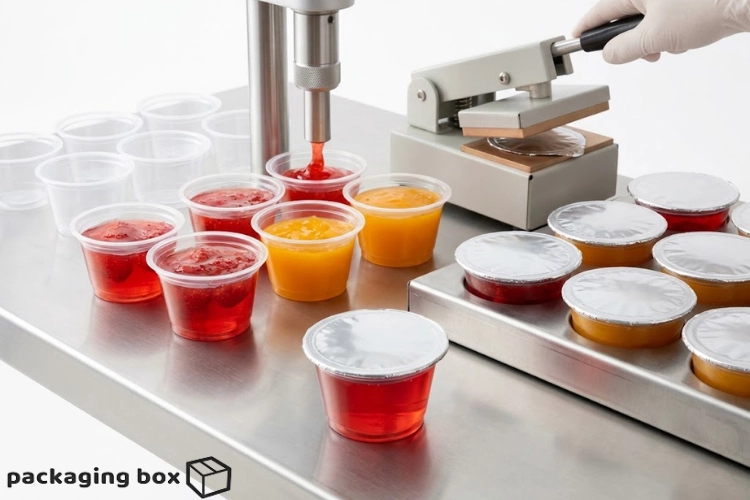

If you’re planning to sell jelly cups commercially, understanding how to fill & seal jelly cups for retail sale is the single most important skill you’ll need before your product ever reaches a shelf. It’s not just about pouring jelly into a cup and slapping a lid on it — retail buyers, supermarkets, and even small kirana stores expect consistent portioning, leak-proof sealing, and packaging that looks professional enough to compete with established brands. Whether you’re running a home-based dessert business or scaling up into a small manufacturing setup, getting this process right determines whether your product survives the journey from your kitchen to a customer’s fridge without spilling, spoiling, or looking amateurish.
In this guide, we’ll walk through the entire jelly cup filling process, the equipment you’ll need, hygiene and labeling requirements, and the smartest ways to keep your production line efficient even if you’re just starting out with small batch jelly cup production.
🍮 Why Proper Filling & Sealing Matters for Jelly Cup Retail Success
Before diving into machines and techniques, it’s worth understanding why this step carries so much weight in your overall business. Jelly cups fall into the category of single-serve packaging, which means every single unit needs to look and perform exactly the same — no half-filled cups, no loose lids, no inconsistent quantities. Retailers are extremely particular about this because a single leaking cup on a shelf can damage their trust in your entire batch, and consumers are quick to associate a poorly sealed product with poor food safety.
There’s also the practical side of shelf-stable dessert products. Jelly, by nature, is sensitive to temperature and contamination. A proper seal doesn’t just keep the product tidy — it acts as your first line of defense against bacteria, moisture loss, and tampering. This is why tamper-evident seal technology has become a baseline expectation rather than a premium feature, even for small businesses selling through local stores or online platforms.
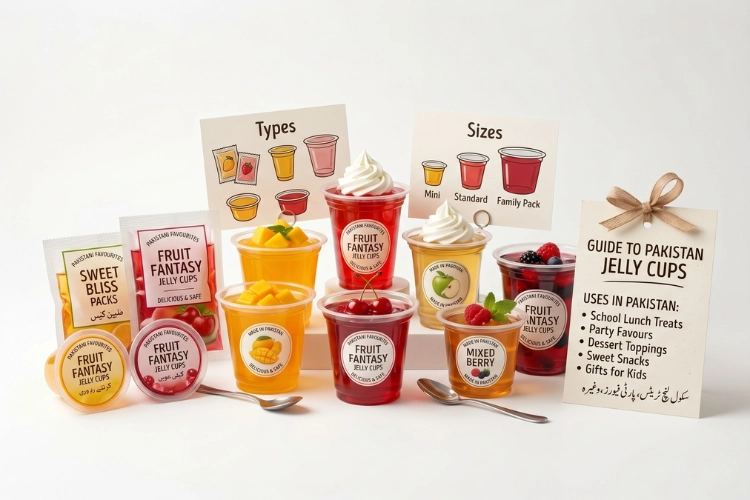
If you’re new to the category altogether, it helps to first understand the different jelly cup types and sizes available in the market, since your filling and sealing approach will vary slightly depending on whether you’re working with a 25ml portion cup or a larger 90ml serving.
🧴 Understanding the Jelly Cup Filling Process
The filling stage is where consistency either gets built into your product or gets lost entirely. At its core, the jelly cup filling process involves three things: preparing your jelly mixture at the correct temperature, dispensing it accurately into the cup, and allowing it to set before sealing. Sounds simple, but each of these steps has room for costly mistakes if rushed.
Choosing the Right Cups and Ingredients
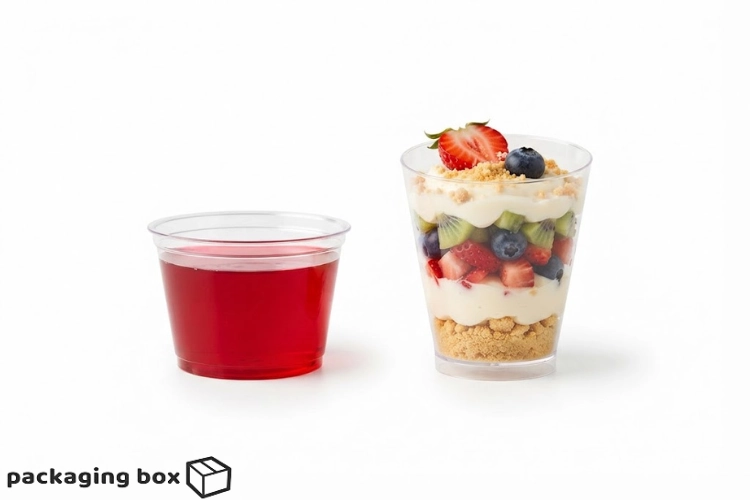
Your choice of plastic dessert cups matters more than most beginners assume. Food-grade packaging isn’t optional — it’s a legal and safety requirement, and using non-food-grade plastic can compromise both the taste and safety of your jelly. Most producers in Pakistan work with clear PET or PP portion cups because they’re transparent (great for showcasing the product’s color), durable enough for transport, and compatible with standard heat sealing equipment.
If you’re sourcing cups for a retail launch, it’s worth browsing a dedicated jelly cup packaging collection rather than generic containers, since these are pre-designed to work seamlessly with sealing films and filling machines. Popular retail sizes include the 25ml jelly cup for kids’ snacks and party favors, and the 90ml jelly cup for a more substantial dessert portion. If you’re deciding between the two for your product line, this breakdown of the 25ml vs 90ml jelly cup comparison explains which size tends to perform better on retail shelves.
Manual vs Automatic Cup Filling Machine
Once you’ve settled on cup size, the next decision is how you’ll actually get the jelly into each cup. Small home-based producers often start manually — using a ladle, funnel, or gravity-fed dispenser to pour jelly into cups one at a time. It works, but it’s slow, and consistency across hundreds of cups becomes genuinely difficult to maintain by hand.
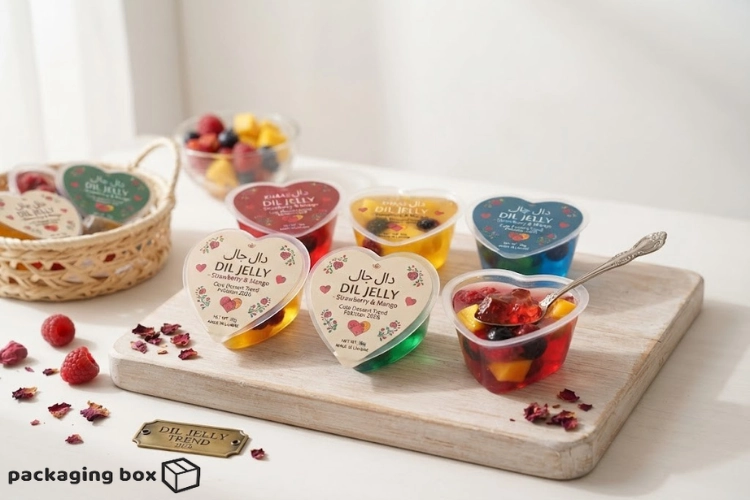
As soon as order volumes grow, most businesses transition to a cup filling machine, which uses a calibrated dispensing head to deliver the exact same volume into every cup. Automatic filling machines can handle anywhere from a few hundred to several thousand cups per hour, and many models allow you to adjust fill volume for different cup sizes — useful if you’re producing both the classic round cup and something more novelty-shaped like a heart jelly cup.
🔥 The Sealing Stage: Locking In Freshness and Trust
Once your cups are filled and the jelly has had time to set, sealing becomes the make-or-break moment for your packaging. This is where a jelly cup sealing machine comes into play, and honestly, this single piece of equipment often has the biggest impact on how “premium” your final product looks and feels.
Heat Sealing Machine Basics
A heat sealing machine works by applying controlled heat and pressure to bond a lidding film to the rim of each cup. The result is an airtight, tamper-evident seal that customers can visually confirm hasn’t been opened — something that matters a great deal for food safety compliance, especially for products sold through supermarkets where shelf handling is unpredictable.
Temperature control is everything here. Too little heat and the seal won’t bond properly, leading to leaks during transport. Too much heat, and you risk warping the cup or scorching the film. Most commercial-grade sealers come with adjustable temperature and dwell-time settings specifically so producers can fine-tune this for different cup materials and film thicknesses.
Choosing the Right Sealing Film / Lidding Film
The sealing film itself — sometimes called lidding film — is another detail that’s easy to overlook but shouldn’t be. Films vary in material composition, with aluminum foil lids being a popular choice for their durability and additional barrier against light and oxygen, which helps extend shelf life. Clear plastic films are also common when brands want the product visible even before opening, which works well for colorful jelly varieties.
Whichever film you choose, make sure it’s rated for food contact and compatible with your specific sealing machine’s temperature range. Mismatched films and machines are one of the most common causes of failed seals in small-batch production runs.
🏭 Jelly Cup Filling and Sealing Equipment for Small Businesses
Not every business needs an industrial production line on day one. Choosing the right jelly cup filling and sealing equipment really comes down to your current order volume, budget, and how much room you have for growth. Below is a quick comparison to help you figure out where your business currently fits.
| Equipment Type | Best For | Typical Output | Approximate Investment |
|---|---|---|---|
| Manual filling + tabletop sealer | Home businesses, testing new flavors | 50–200 cups/hour | Low |
| Semi-automatic filling & sealing machine | Growing small batch jelly cup production | 500–1,500 cups/hour | Moderate |
| Fully automatic filling and sealing line | Retail-scale, wholesale, export orders | 3,000+ cups/hour | High |
If you’re still in the early stages, starting with a semi-automatic setup tends to strike the best balance between cost and reliability. It’s fast enough to fulfill moderate retail orders without requiring the space, staffing, or capital investment that fully automated lines demand.
📦 Step-by-Step: How to Package Jelly Cups for Sale
With filling and sealing equipment sorted, let’s walk through the practical sequence most successful producers follow when packaging jelly cups for sale. This isn’t just about the machinery — it’s about the workflow around it that keeps quality consistent batch after batch.
Start by preparing your jelly mixture in a clean, temperature-controlled environment, since even a few degrees off can affect setting time and texture. Once the mixture reaches the correct consistency, run it through your filling machine or manual dispenser, ensuring each cup receives an equal portion. Allow the filled cups to rest and set fully — rushing this step is one of the most common reasons seals fail later, since any residual moisture or unset jelly near the rim prevents the lidding film from bonding properly.
Next comes the sealing stage itself, followed immediately by a visual quality check. Experienced producers typically inspect a sample from every batch, pressing gently on the seal to confirm there’s no give or air leakage. After sealing, cups move to labeling, where batch numbers, manufacturing dates, and expiry information get applied. Finally, sealed and labeled cups are packed into secondary cartons or trays for transport to retail locations.
A few practical checkpoints worth keeping in mind throughout this process:
- Always test seal strength on a small sample before running a full production batch
- Keep filling and sealing areas separate from raw ingredient prep to avoid cross-contamination
- Store finished cups upright until fully cooled to prevent seal displacement
🛡️ Food Safety, Hygiene & Labeling Requirements
Retail buyers in Pakistan — whether large supermarket chains or neighborhood stores — increasingly expect proper documentation and hygiene standards before they’ll stock a product. This means your production space needs to follow basic commercial kitchen equipment hygiene protocols: sanitized surfaces, covered storage for raw ingredients, and staff trained in basic food handling practices.
Labeling requirements typically include the product name, net weight or volume, manufacturing and expiry dates, ingredient list, and your business’s contact or registration details. If you’re planning to distribute beyond a local scale, it’s worth getting familiar with Pakistan’s food safety compliance standards early, since retrofitting your packaging line to meet regulations later is far more expensive than building it in from the start.
For businesses just entering this space, resources like starting a jelly cup business in Pakistan walk through the regulatory and operational basics in more depth, which pairs well with the technical filling and sealing knowledge covered here.
🧊 Storage Conditions and Shelf Life Considerations
A properly filled and sealed jelly cup doesn’t automatically guarantee a long shelf life — storage conditions play an equally important role. Most commercial jelly formulations are designed to be shelf-stable at room temperature for a defined period, but this depends heavily on the preservatives used, sugar content, and how airtight your seal actually is.
Generally, cups should be stored away from direct sunlight and extreme heat, since both can cause the jelly to soften or separate over time. If you’re aiming for a genuinely shelf-stable dessert that doesn’t require refrigeration, aluminum foil lids tend to outperform standard plastic films because they provide a stronger barrier against oxygen and light exposure — two of the biggest culprits behind reduced shelf life.
🚀 Scaling Up: From Small Batch Jelly Cup Production to Retail Shelves
Once your process is dialed in and your first retail orders start coming through, the natural next question becomes how to scale without losing quality. This is usually where businesses upgrade from manual or semi-automatic setups to higher-throughput equipment, and it’s also where packaging choices start mattering for branding, not just function.
Novelty shapes like the heart jelly cup or flavor-forward options like choc-dip jelly cups can help differentiate your brand on a crowded shelf, especially in the gifting and kids’ snack segments. If you’re weighing bulk production costs at this stage, this guide on minimum order quantities and bulk packaging costs is a genuinely useful reference before placing a larger cup or film order.
It’s also worth exploring general guidance on affordable food packaging solutions for small businesses and, if you’re building this into a full operation, the broader roadmap for starting a packaging-focused business in Pakistan covers many of the same principles that apply here.
✅ Common Mistakes to Avoid When Filling and Sealing Jelly Cups
Even experienced producers occasionally run into avoidable issues, and it’s usually the small details that trip people up. Overfilling cups beyond the rim line is a frequent culprit — it leaves no clean surface for the seal to bond to, resulting in leaks. Using mismatched film and cup materials is another common error, often caused by switching suppliers without testing compatibility first.
Skipping the cooling and setting period before sealing is perhaps the most underrated mistake, since warm or partially set jelly can compromise seal integrity even if everything else in the process was done correctly. Lastly, inconsistent temperature control on the sealing machine itself — whether from poor calibration or inconsistent power supply — tends to produce a batch with mixed seal quality, which is exactly the kind of inconsistency retail buyers notice immediately.
🎯 Final Thoughts
Mastering how to fill and seal jelly cups for retail sale isn’t about owning the fanciest machinery — it’s about understanding each stage of the process well enough to catch problems before they reach a customer’s hands. From selecting food-grade cups and the right cup filling machine, to dialing in your heat sealing machine settings and choosing a lidding film that actually matches your product’s shelf-life goals, every decision compounds into the final impression your jelly cups make on a retail shelf.
Whether you’re just testing your first small batch or preparing to scale into wholesale distribution, the fundamentals covered here — hygiene, consistent portioning, reliable sealing, and proper labeling — will carry your product through every stage of growth. If you’re ready to source cups, sealing films, or filling equipment that’s built specifically for this kind of retail production, explore our full jelly cup packaging range or browse the complete packaging shop for everything else your dessert line might need.
❓ Frequently Asked Questions
Q1: What equipment do I need to start filling and sealing jelly cups for retail sale? At minimum, you’ll need food-grade plastic dessert cups, a filling method (manual or automatic), a heat sealing machine, and compatible lidding film. Small businesses often start with manual filling and a tabletop sealer before upgrading to semi-automatic equipment as order volume grows.
Q2: How long do sealed jelly cups typically stay fresh? Shelf life depends on your recipe and sealing quality, but most commercially prepared jelly cups with a proper tamper-evident seal remain shelf-stable for several weeks to a few months when stored away from direct heat and sunlight.
Q3: Can I fill and seal jelly cups manually for a small business? Yes, manual filling and tabletop sealing work well for low-volume operations, though consistency becomes harder to maintain as order volume increases. Most businesses transition to semi-automatic equipment once they’re producing more than a few hundred cups regularly.
Q4: What size jelly cup sells best for retail? Both 25ml and 90ml cups perform well depending on the target audience — smaller cups suit kids’ snacks and party favors, while larger cups work better as a standalone dessert portion. Testing both in your specific market is the best way to confirm demand.
Q5: Is aluminum foil lid better than plastic film for jelly cups? Aluminum foil lids generally provide a stronger barrier against light and oxygen, which can extend shelf life slightly compared to standard plastic films. However, plastic films offer better product visibility, which some brands prefer for marketing purposes.


💬 0 Comments
Leave a Comment